

 English
 Français
 русский
 عربى
عربى Español
Content
- 1 Understanding the Composition of High-Quality Moisture-Proof Marble Stickers
- 2 Critical Performance Features for Humid Environments
- 3
- 4 Preparation and Installation Strategy for a Seamless Finish
- 5 Long-term Maintenance and Care Instructions
- 6 Comparing Moisture-Proof Stickers to Traditional Renovation
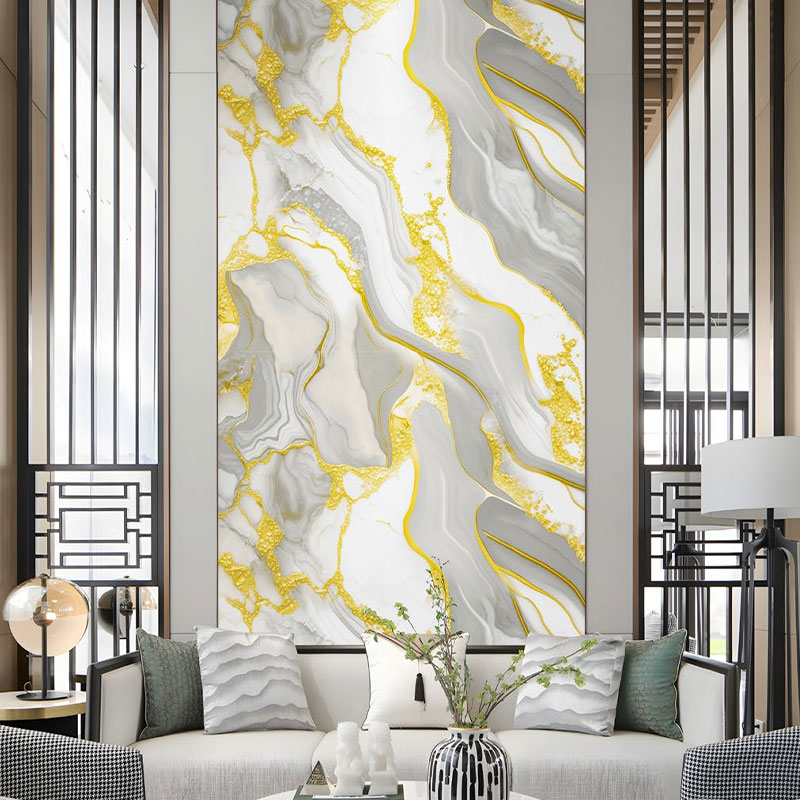
Understanding the Composition of High-Quality Moisture-Proof Marble Stickers
Modern marble wall stickers are not merely decorative papers; they are engineered multi-layer films designed to withstand harsh environments. The top layer typically consists of a high-definition PET or PVC film that replicates the intricate veining of natural stone while providing a non-porous shield. Beneath this aesthetic layer lies a specialized moisture-proof barrier that prevents water vapor from penetrating the substrate. This construction is crucial for high-humidity areas like bathrooms and kitchen backsplashes, where traditional wallpaper would peel or develop mold. The integration of a strong, pressure-sensitive adhesive ensures that once the sticker is applied, it creates a watertight seal against the wall surface.
Critical Performance Features for Humid Environments
When selecting a Moisture-proof Marble Wall Sticker, the "moisture-proof" label refers to several distinct technical capabilities. To ensure longevity, the product must offer a combination of water resistance, oil resistance, and heat stability. In a kitchen setting, the sticker must repel grease splashes and be easy to wipe clean without degrading the printed pattern. In bathrooms, the material must handle frequent temperature fluctuations and constant exposure to steam without losing its adhesive properties.
| Feature | Benefit |
| Hydrophobic Coating | Causes water to bead up and roll off the surface. |
| Anti-Fouling Layer | Prevents stains from cooking oils and soap scum. |
| Thickened PVC | Provides durability and covers minor wall imperfections. |
Preparation and Installation Strategy for a Seamless Finish
Surface Priming and Cleaning
The success of a moisture-proof sticker depends entirely on the initial bond. You must ensure the wall is completely free of dust, grease, and existing mold. Use a mixture of isopropyl alcohol and water to degrease the area thoroughly. If the surface is particularly porous, such as bare plaster, a light primer may be necessary to ensure the adhesive can grip effectively. Ensure the wall is bone-dry before beginning the application, as trapped moisture will eventually cause bubbling.
The Dry Application Method
To achieve a professional look that mimics real marble slabs, follow these specific steps during installation:
- Measure the wall height and width, adding a 2cm margin to each side for trimming.
- Align the first sheet using a spirit level to ensure the "veins" of the marble run straight.
- Peel the backing paper slowly while using a felt-edge squeegee to push air from the center outward.
- Use a heat gun or hair dryer on low heat at the corners to help the vinyl conform to edges and seal the adhesive.
Long-term Maintenance and Care Instructions
Maintaining the "wet look" of marble stickers requires minimal but specific effort. Unlike real marble, which is porous and requires sealing, these stickers are non-porous and can be cleaned with standard household cleaners. However, abrasive scrubbing pads and harsh bleach solutions should be avoided as they can micro-scratch the protective film, leading to a dull finish over time. For best results, use a soft microfiber cloth and a pH-neutral soap. If the sticker is placed near a stove, ensure there is at least a 15-20cm gap from open flames to prevent thermal deformation of the PVC material.
Comparing Moisture-Proof Stickers to Traditional Renovation
Choosing moisture-proof marble stickers over real stone or ceramic tiles offers several practical advantages for homeowners and renters alike. While real marble is a significant investment that requires professional masonry, stickers provide a high-end aesthetic at a fraction of the cost. They are particularly useful for updating rental properties where permanent changes are prohibited, as they can usually be removed without damaging the underlying paint if heat is applied during the removal process.
- Cost-effective: High-end look without the price tag of Carrara or Calacatta stone.
- DIY-Friendly: No need for specialized tools like wet saws or grout floats.
- Instant Gratification: A kitchen backsplash can be completed in under two hours.


